How to Draw a Dolphin Step by Step Easy Baby Doll
This tutorial shows how to draw a dolphin in nine steps. It provides a detailed breakdown of the drawing process with explanations and illustrated examples.
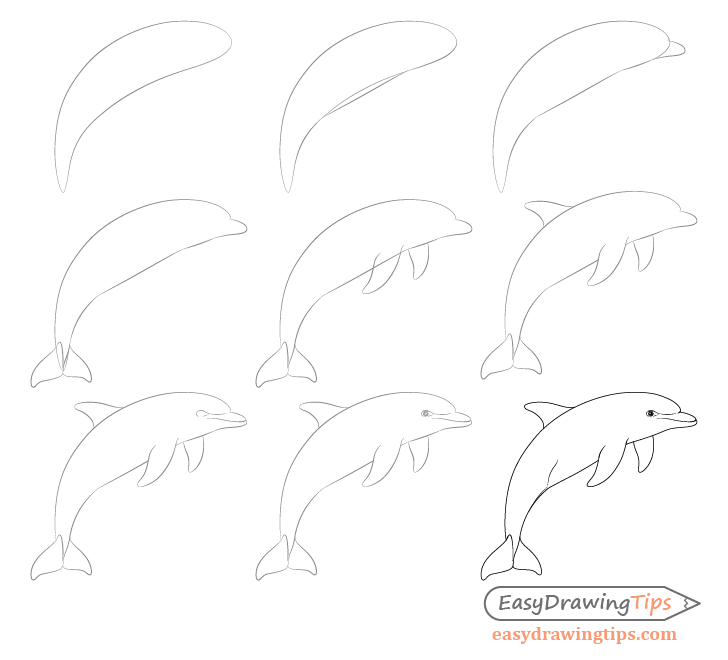
This tutorial can be particularly helpful for beginners as it's fairly easy and teaches a good approach to drawing (going form larger shapes down to smaller details).
It's recommended that you do this tutorial in pencil. Also be sure to make light lines that you can easily erase as you will need to clean up some of them when moving from one step to another. If your lines still leave marks on the paper after you erase them then you are pressing too hard on the pencil.
It's also important to note that the dolphin will be drawn in 3/4 view. This will make the drawing look more interesting than simply drawing one from the side.
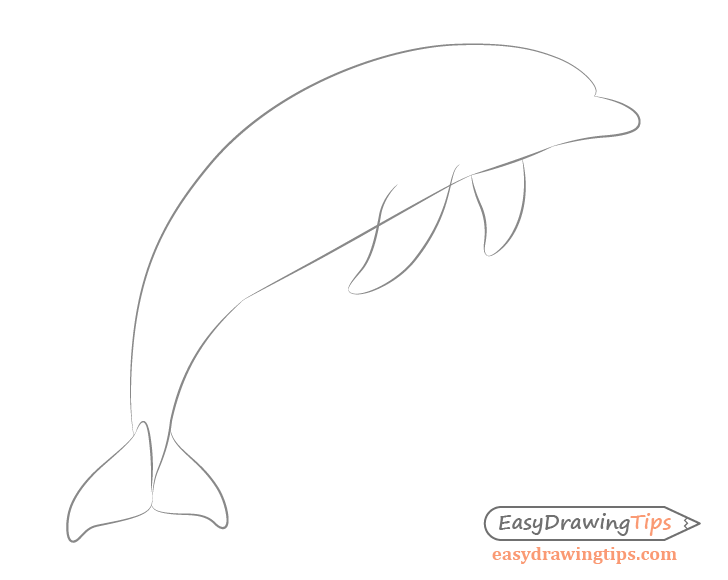
Step 1 – Draw the Outline of the Dolphin's Body
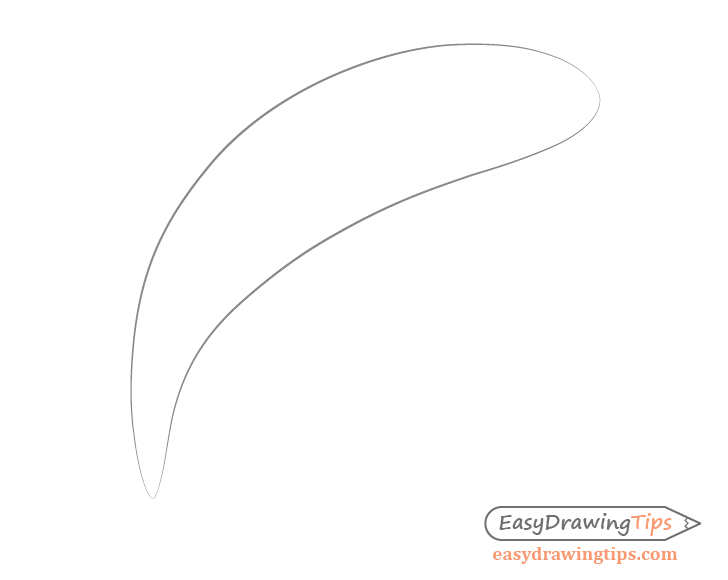
In this case the dolphin will be in a very characteristic pose that they tend to take when jumping out of the water.
Start the drawing with a simplified outline of it's body (drawn with a curve). It should be thicker towards the head and thinner towards the tail.
Step 2 – Draw the Stomach
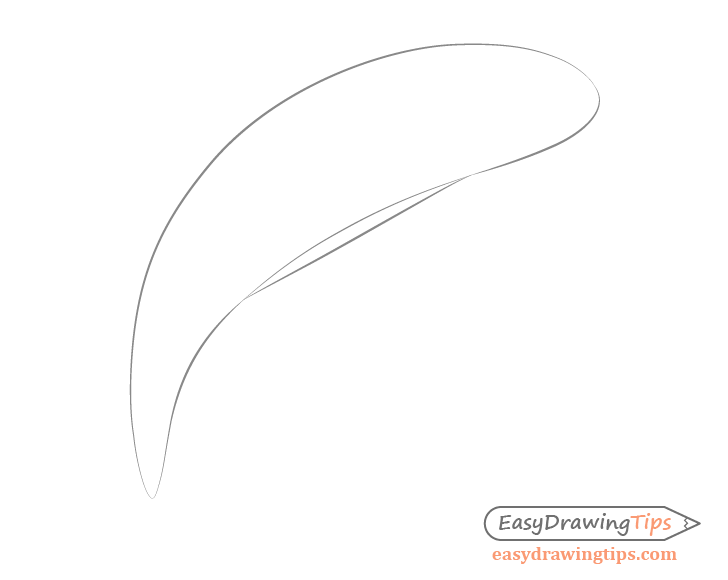
On the bottom part of the body slightly more towards the head add the stomach area. You can do this with pretty much just one curved line.
You can then erase the part of the body outline above it.
Step 3 – Draw the Nose
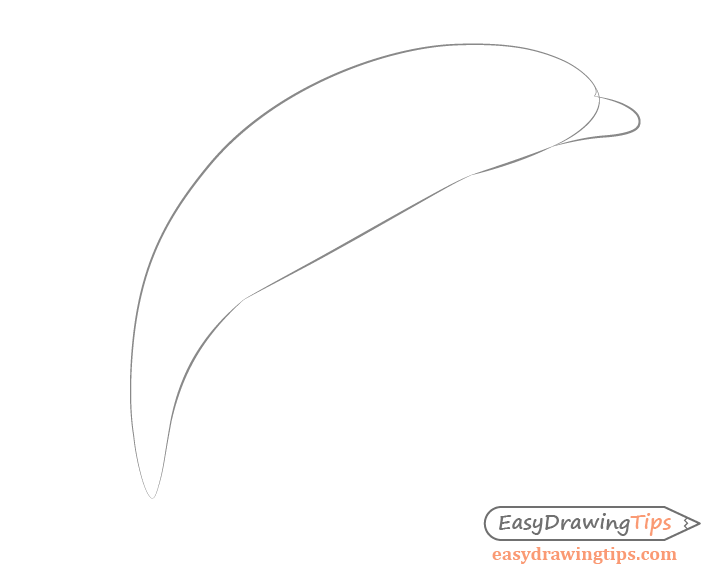
Now add the hose and and a tiny bump just above it for the forehead. You can pretty much outline them with just one curve for each.
After adding the nose you can erase the part of the body outline behind it.
Step 4 – Draw the Tail

Draw the tail with it's front half (closer to the viewer) slightly larger than the farther away half. This will give the drawing some perspective.
If you are not familiar with perspective drawing see the following:
Perspective Drawing Tutorial for Beginners
Step 5 – Draw the Flippers
Towards the upper part of the body add the flippers. Draw these with a bit of a wave shape in them, again making the front one slightly larger than the one in the back.
Also keep in mind that part of the background flipper will be hidden behind the body making it look slightly shorter.
Step 6 – Draw the Fin
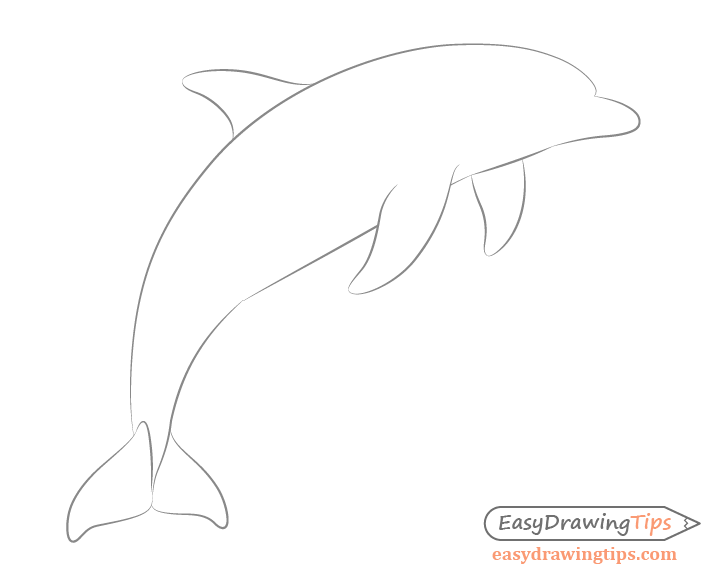
To finish outlining the dolphin's major body parts add the fin on the back. Make it wider towards the body and narrower towards the tip.
Step 7 – Draw the Face
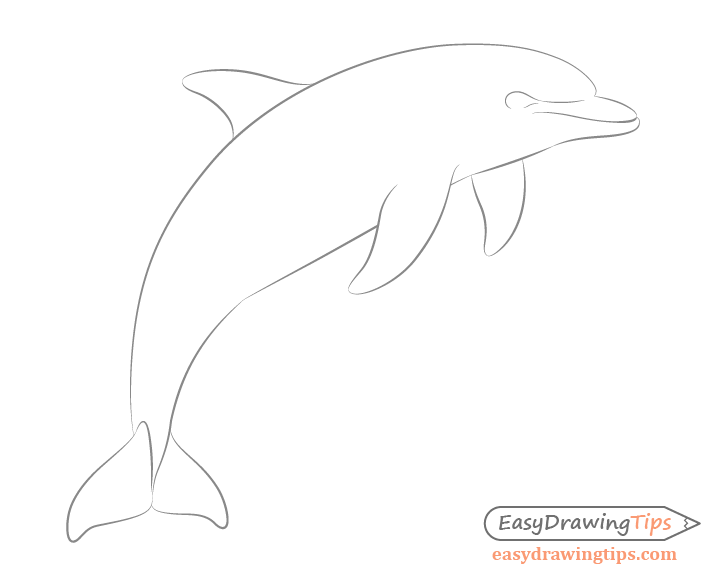
Add the dolphin's facial features starting with the mouth, the area around the eye and the forehead.
First draw the eye area positioning it about halfway between the top and bottom of the head. Next add the mouth. Draw it with a wave like shape that starts from the tip of the nose and eventually gets fairly close to the area of the eye.
You can finally add a small curve a bit above the nose to further emphasize the forehead.
Step 8 – Draw the Eye
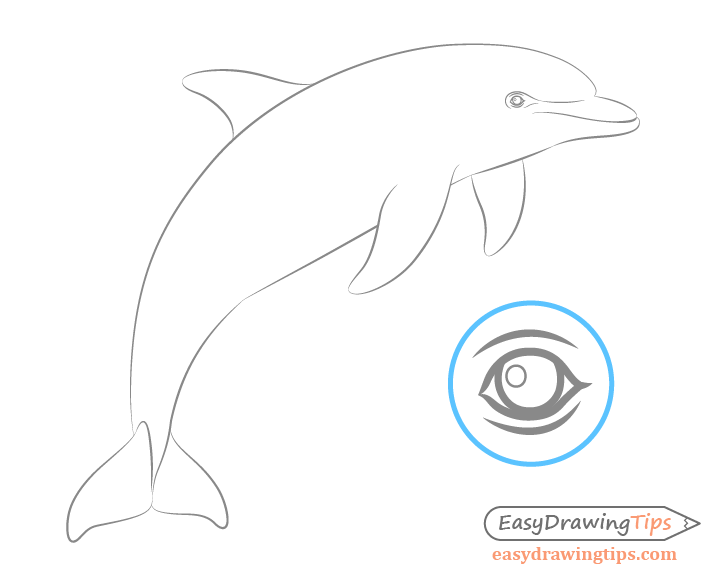
As the eye in the main drawing is pretty small a close up example of it is included
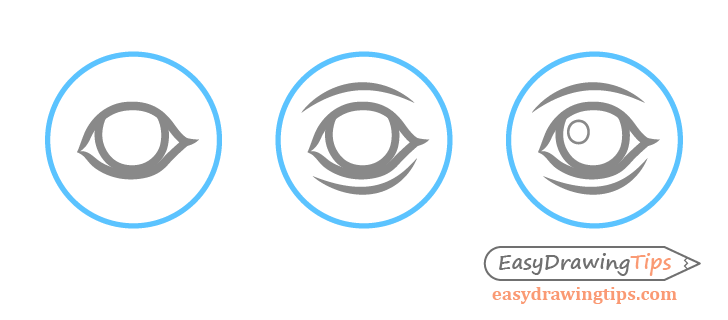
In the example above you can first see the drawing of the eye followed by one that adds some eyelid details and finally the finish one with the highlight.
Step 9 – Finish the Dolphin Drawing
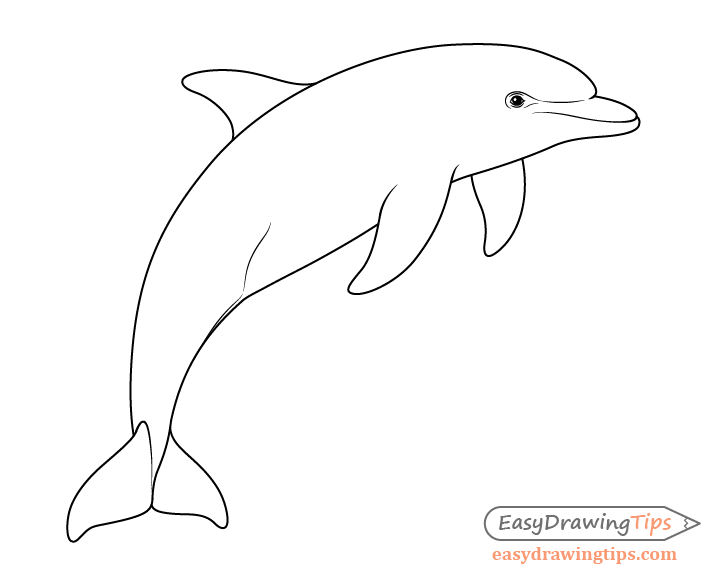
To finish the dolphin drawing you can add a couple of details to the stomach area as shown in the example above. Add one small curve to emphasize the stomach and one more curve (barely noticeable) that runs down along the tail to show a kind of split dolphins tend to have in that area.
Once you are pretty much done with the drawing you can darken your lines by tracing over them. You can also shade in the eye (leaving the highlight area white).
Conclusion
Drawing a dolphin is not particularly complicated. However even for simple drawings it's a good idea to use the right approach. In most cases you want to start your drawing going from the larger parts of your subject to the smallest. Drawing in this way can save you time by reducing the amount of backtracking you have to do in case you make a mistake. It can also help you make fewer mistakes in general.
For more on good drawing practices see:
- Beginner Guide to Learning to Draw
- Absolute Beginner Drawing Exercises Tutorial
For other tutorial similar to this one see:
- How to Draw a Frog Step by Step Tutorial
- How to Draw a Rabbit Step by Step Tutorial
- How to Draw a Squirrel From the Side View Tutorial
- How to Draw a Sunflower Step by Step
wilkersonnour1977.blogspot.com
Source: https://www.easydrawingtips.com/how-to-draw-a-dolphin-step-by-step/
0 Response to "How to Draw a Dolphin Step by Step Easy Baby Doll"
Post a Comment